SuperMicro X11SSM Assembly
The main purpose of this server build is to be a NAS. To host a bunch of storage, and related network services such as Samba. Similar to FreeNAS, but based on a regular FreeBSD install. But I also wanted to be able to do a bit more, such as experiment with different applications, and run multiple virtual development servers, and maybe even run some heavier things like a public game server. The main requirements are stability and performance, power consumption is secondary but still a factor.
I spent over a year researching the components for this server build. Wanted to really get everything perfect, and I think I nailed it. Looked at both the Mini-ITX and Micro-ATX form factors, and brands such as SuperMicro and ASRock Rack, as well as the tradeoffs between SoC and proper CPU’s.
Mini-ITX seemed really attractive at first glance. There is just something special about building a really small and tight system. However, it seems you are paying a premium for the smaller form factor, higher price for the actual power of the components. Also expandability is limited, in the future it might be relevant to have both a SAS HBA, as well as a 10GbE NIC, which would not be possible as Mini-ITX only has one PCI expansion slot. Also, the smallest cases (such as U-NAS) do not seem to provide good enough airflow. The Node 304 case is an interesting option, but it basically takes up as much space as a tower, and lacks sound dampening.
Took a long hard look at ASRock Rack C2750, but decided against it. Partly because there has been multiple reports that some units apparently die after 1-2 years. Also the Intel Avoton CPU feels like it could be very limiting in the long run, and there is no way to upgrade it as it is an SoC.
Spent some time looking at Xeon D boards, but realized that it would be the basically the same price as a regular Xeon, but without the possibility to upgrade the CPU. I guess these boards are mainly good for single purpose systems, such as routers or dedicated NAS boxes, where the main goal is to be able to “set it and forget it”.
So I eventually decided on Micro-ATX, as this allows for a slightly smaller case than a full tower, while still maintaining adequate expandability, and good ventilation. SuperMicro seems to be very popular in the FreeNAS community, so that is what I went with. They have this overview of X11 motherboards that was quite helpful to get started.
Components
Here is the list of components I ended up with:
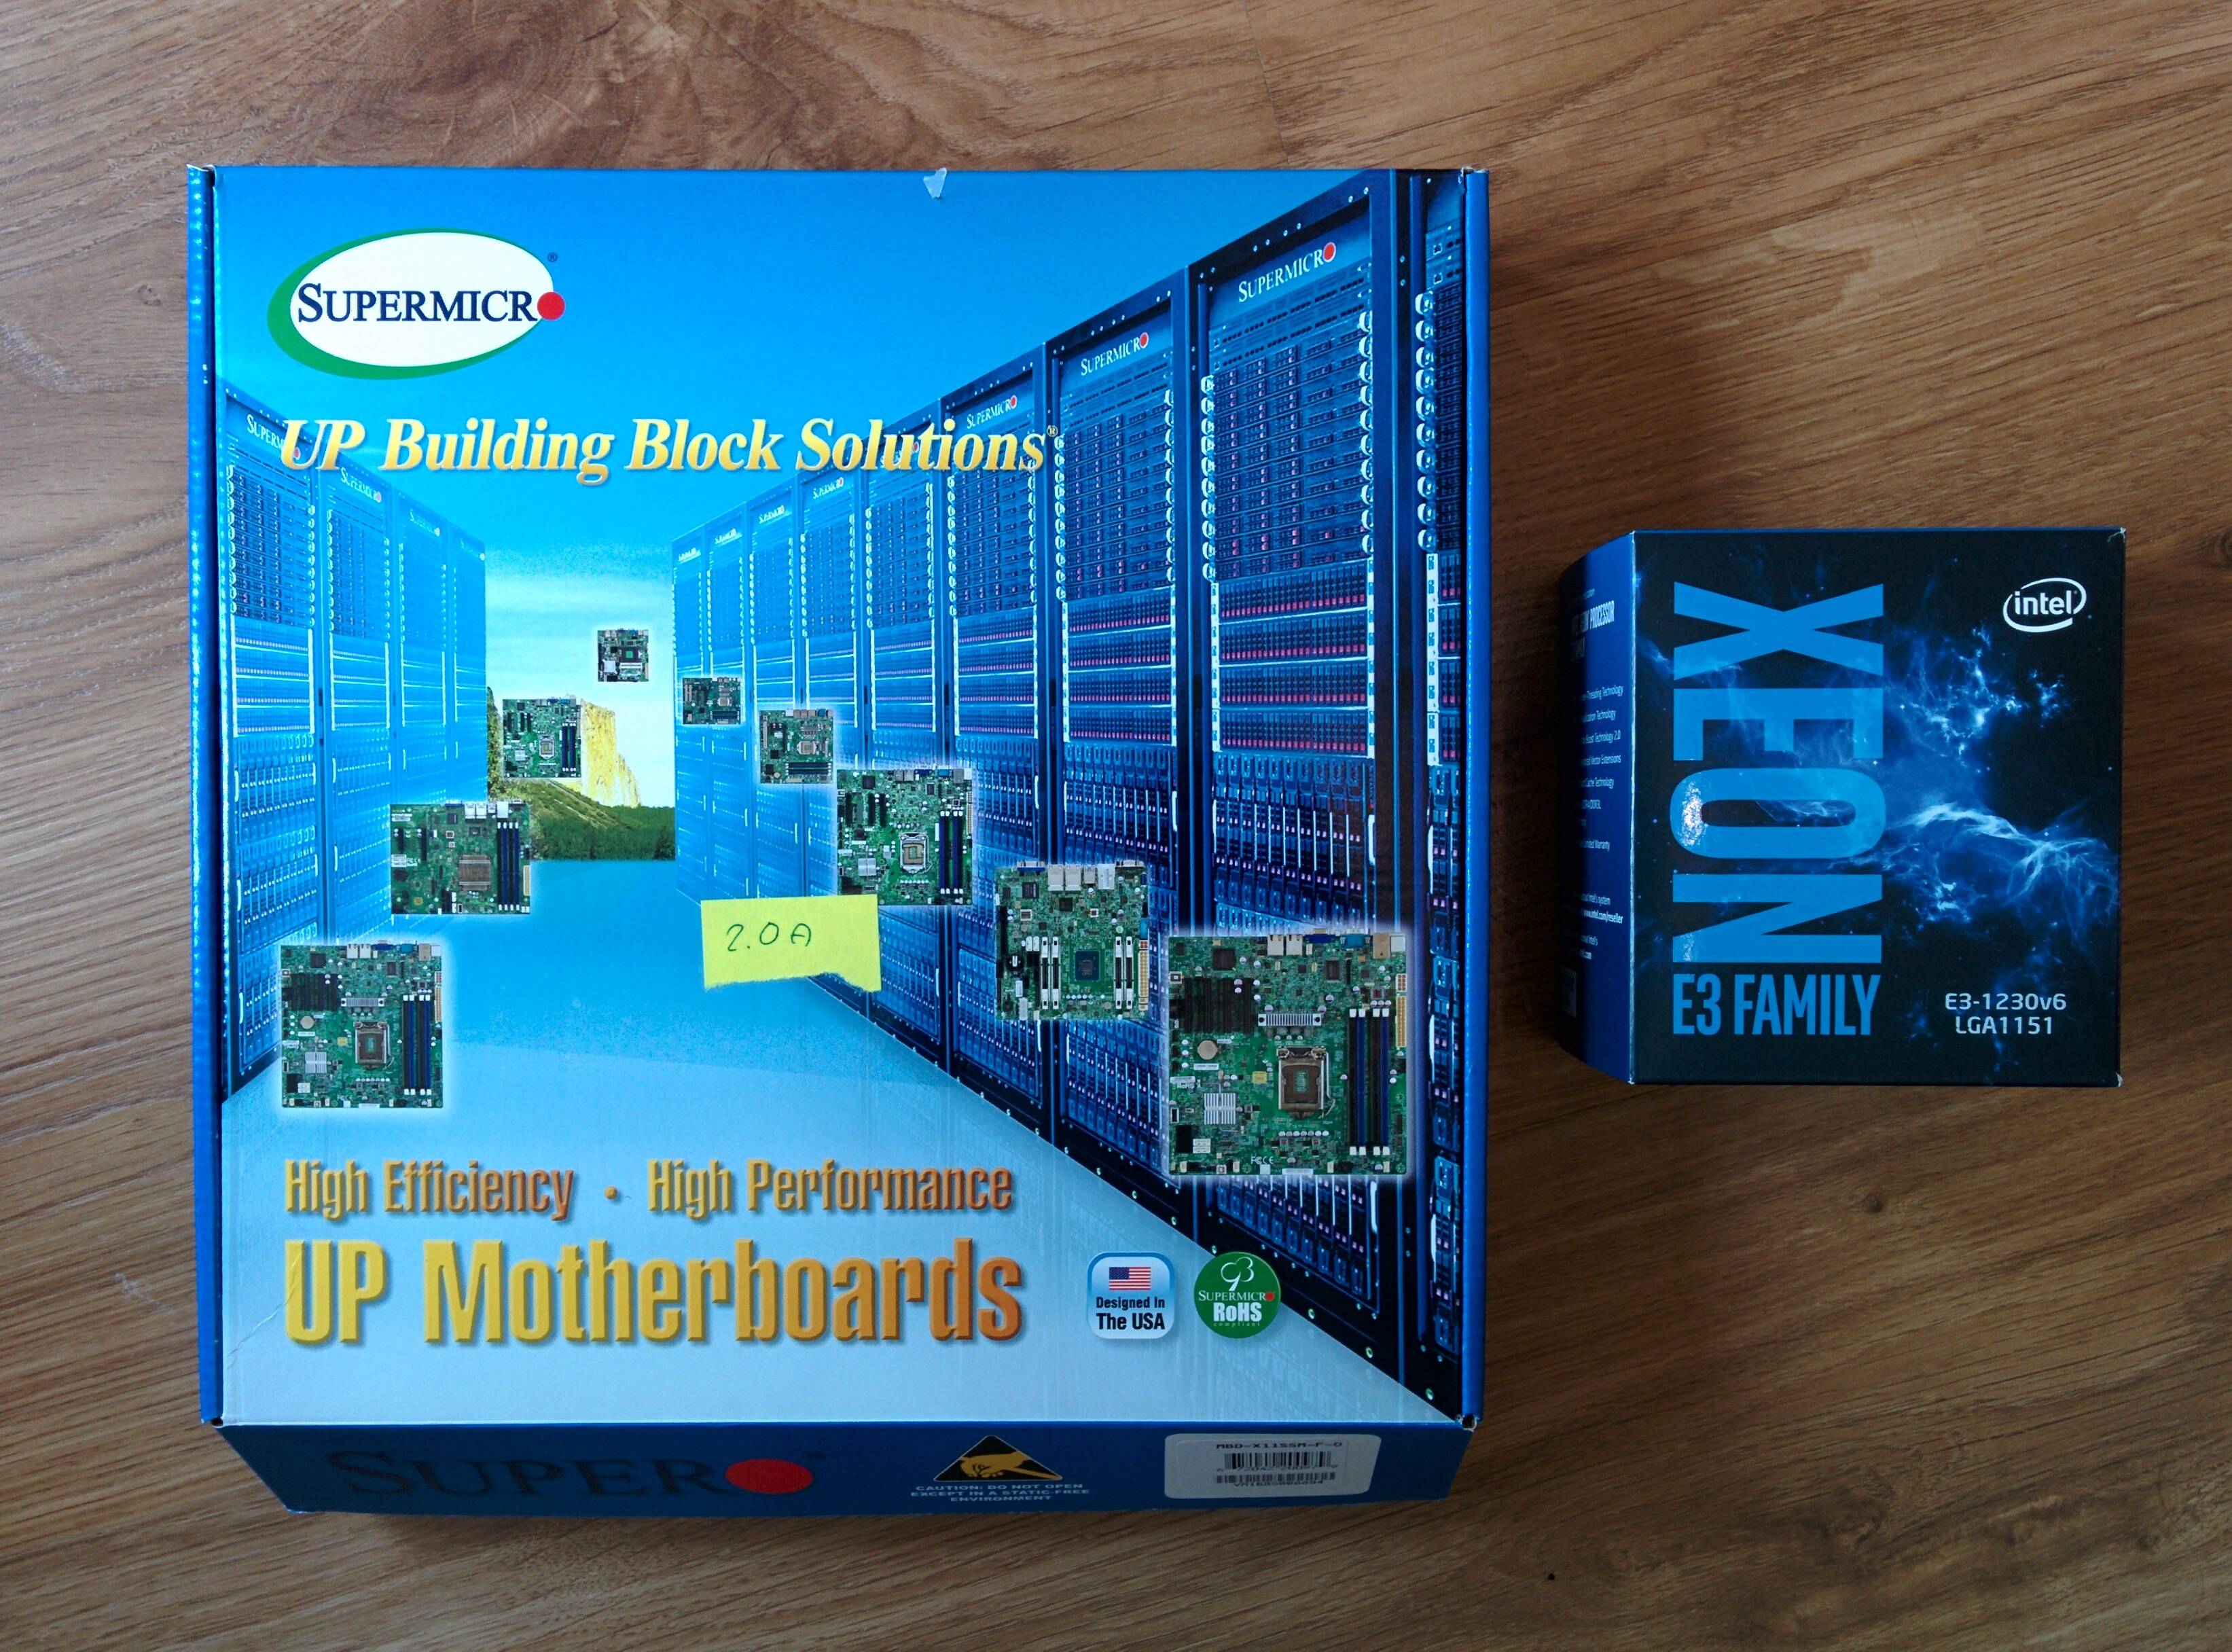
- 1x SuperMicro X11SSM-F (Micro-ATX, LGA 1151, Dual i210-AT, 8 SATA3)
- 1x Xeon E3-1230v6 (3.50 GHz, Quad-core, Hyper-Threading, 72W)
- 1x Samsung M391A2K43BB1-CRC (16GB, DDR4 2400Mhz, ECC, Unbuffered)
- 1x EVGA 750 GQ (750W PSU, 80+ Gold)
- 2x Western Digital WD40EFRX (WD Red 4TB)
- 1x Fractal Design Define Mini (Micro-ATX/Mini-ITX, Sound dampened)
Total price: around 1500 EUR.
Also grabbed an old Intel SSD I had laying around, which is used for the root file system. Another option here could be to install directly on a USB memory stick. This motherboard actually has an onboard USB 3 port (close to the SATA ports) for that very purpose.
Building in this case is really enjoyable, very little screwing, no sharp edges. And absolutely everything you need is included, even two fans.
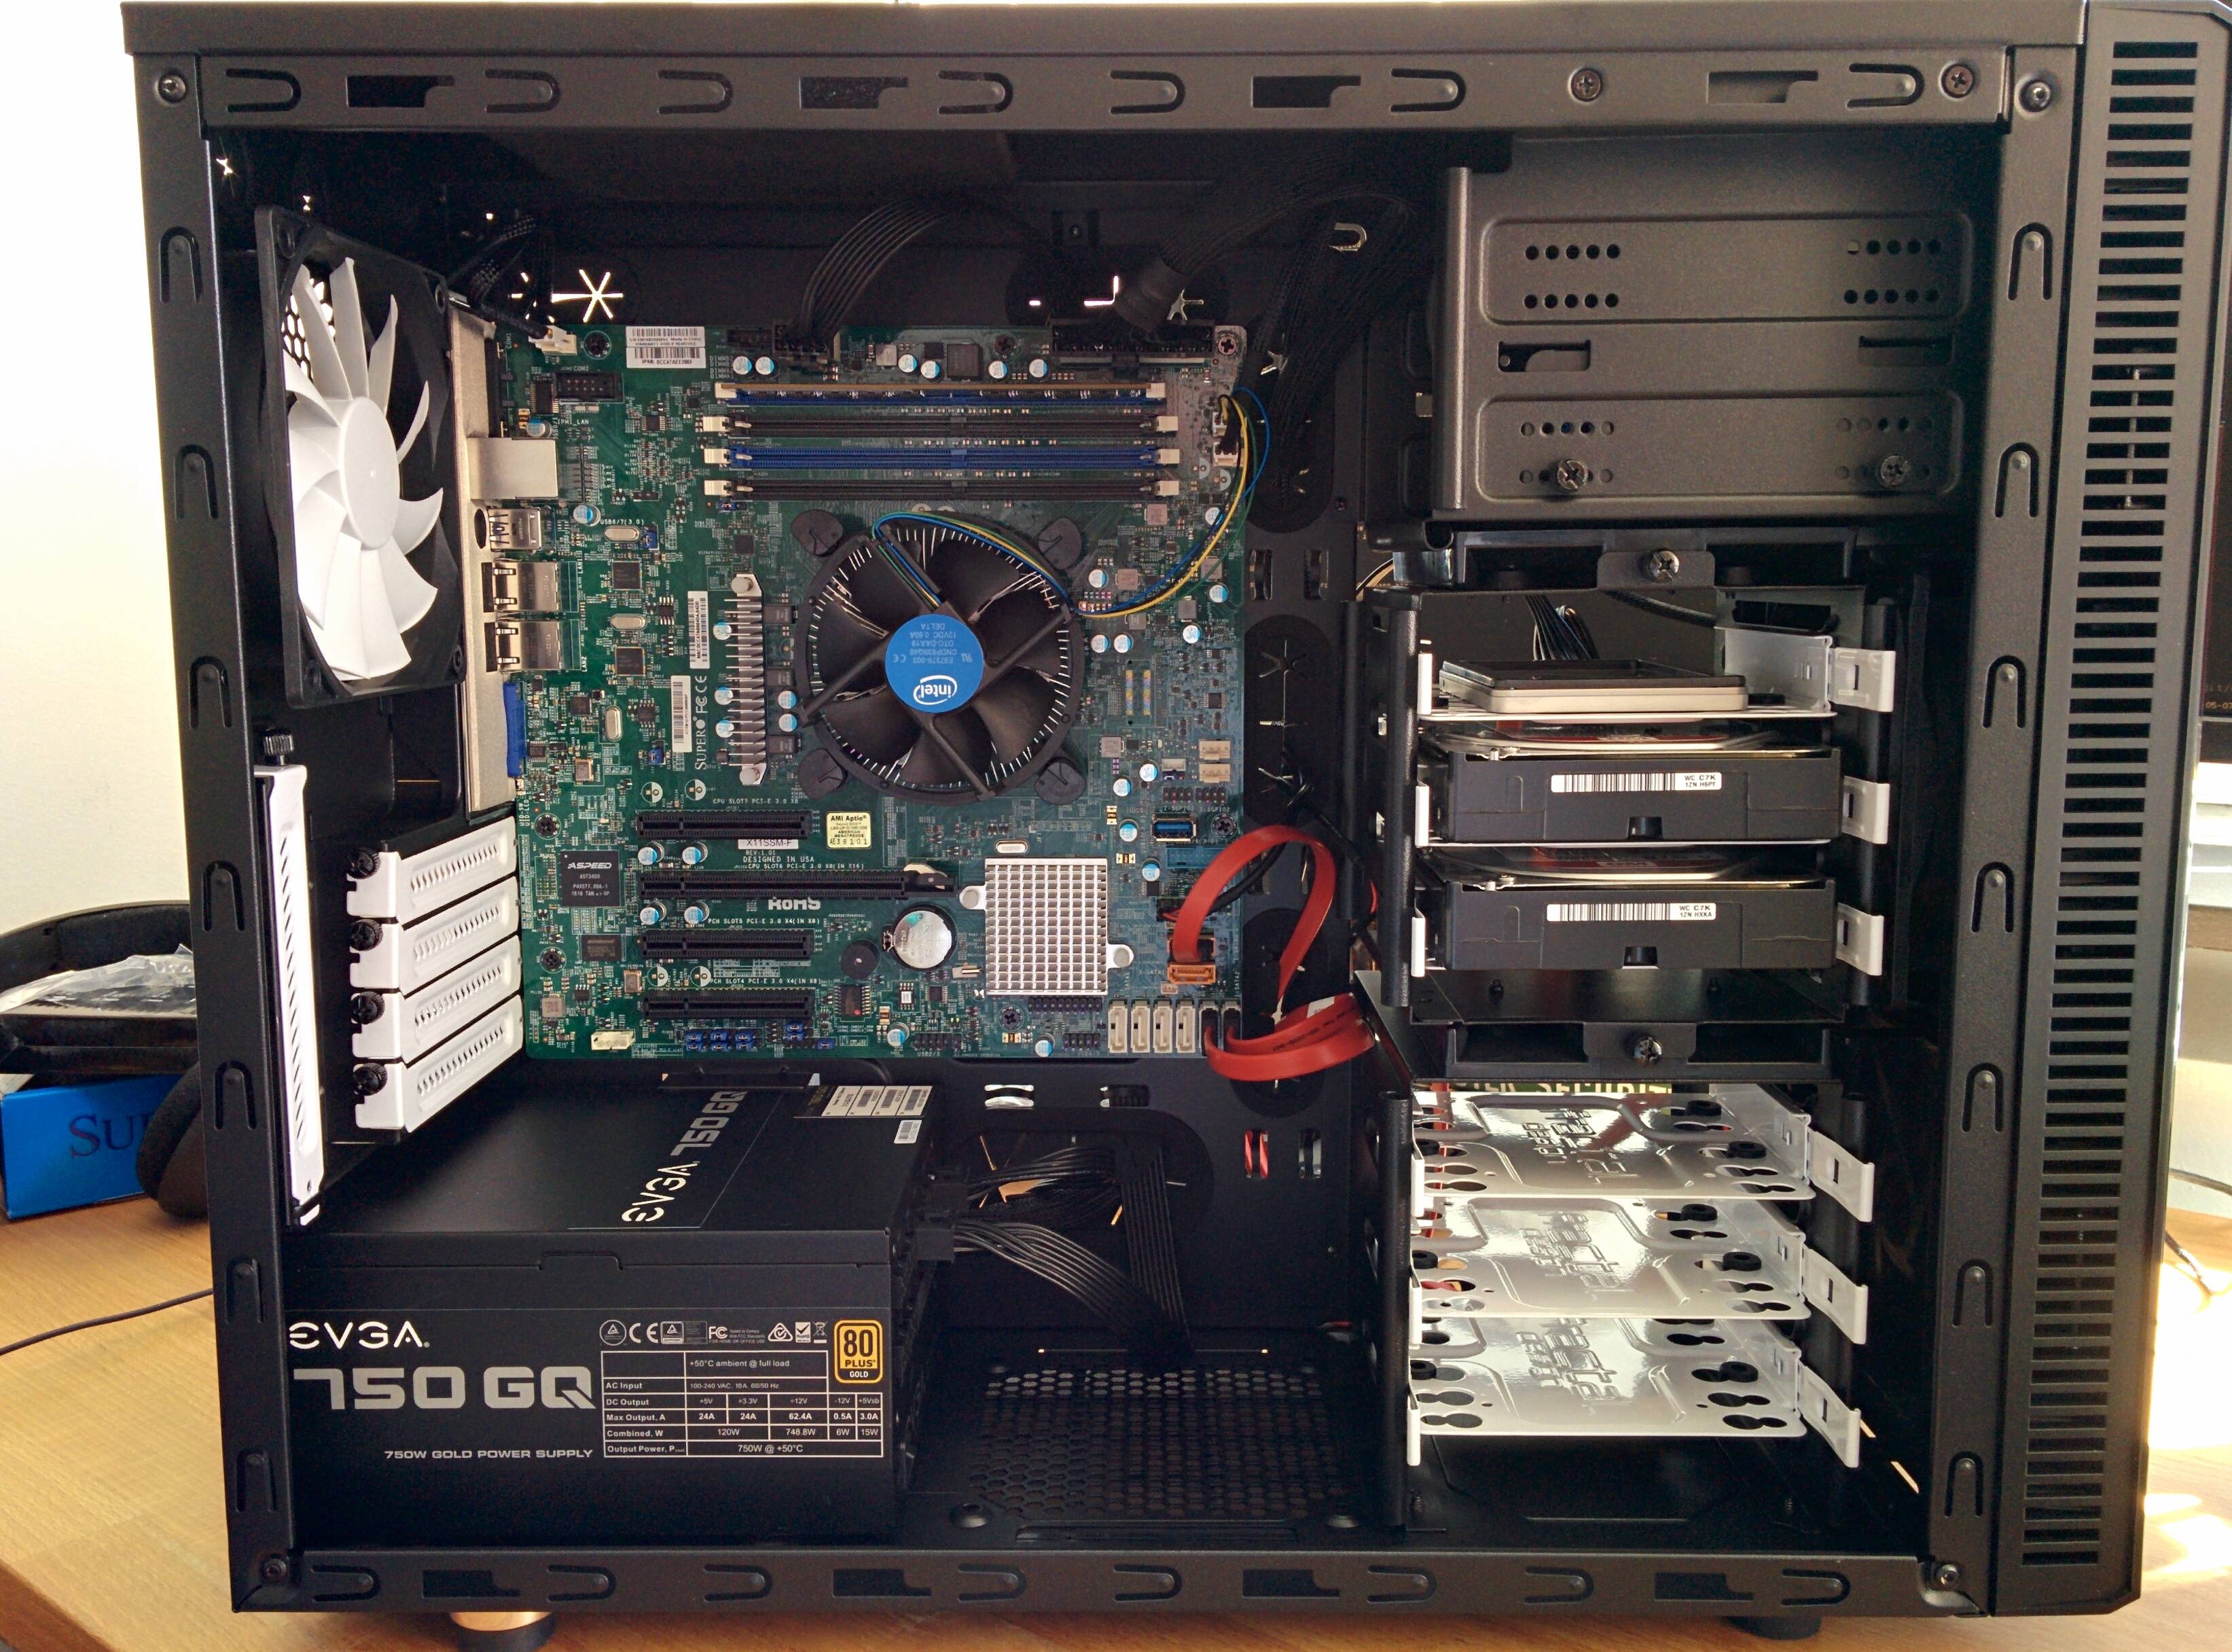
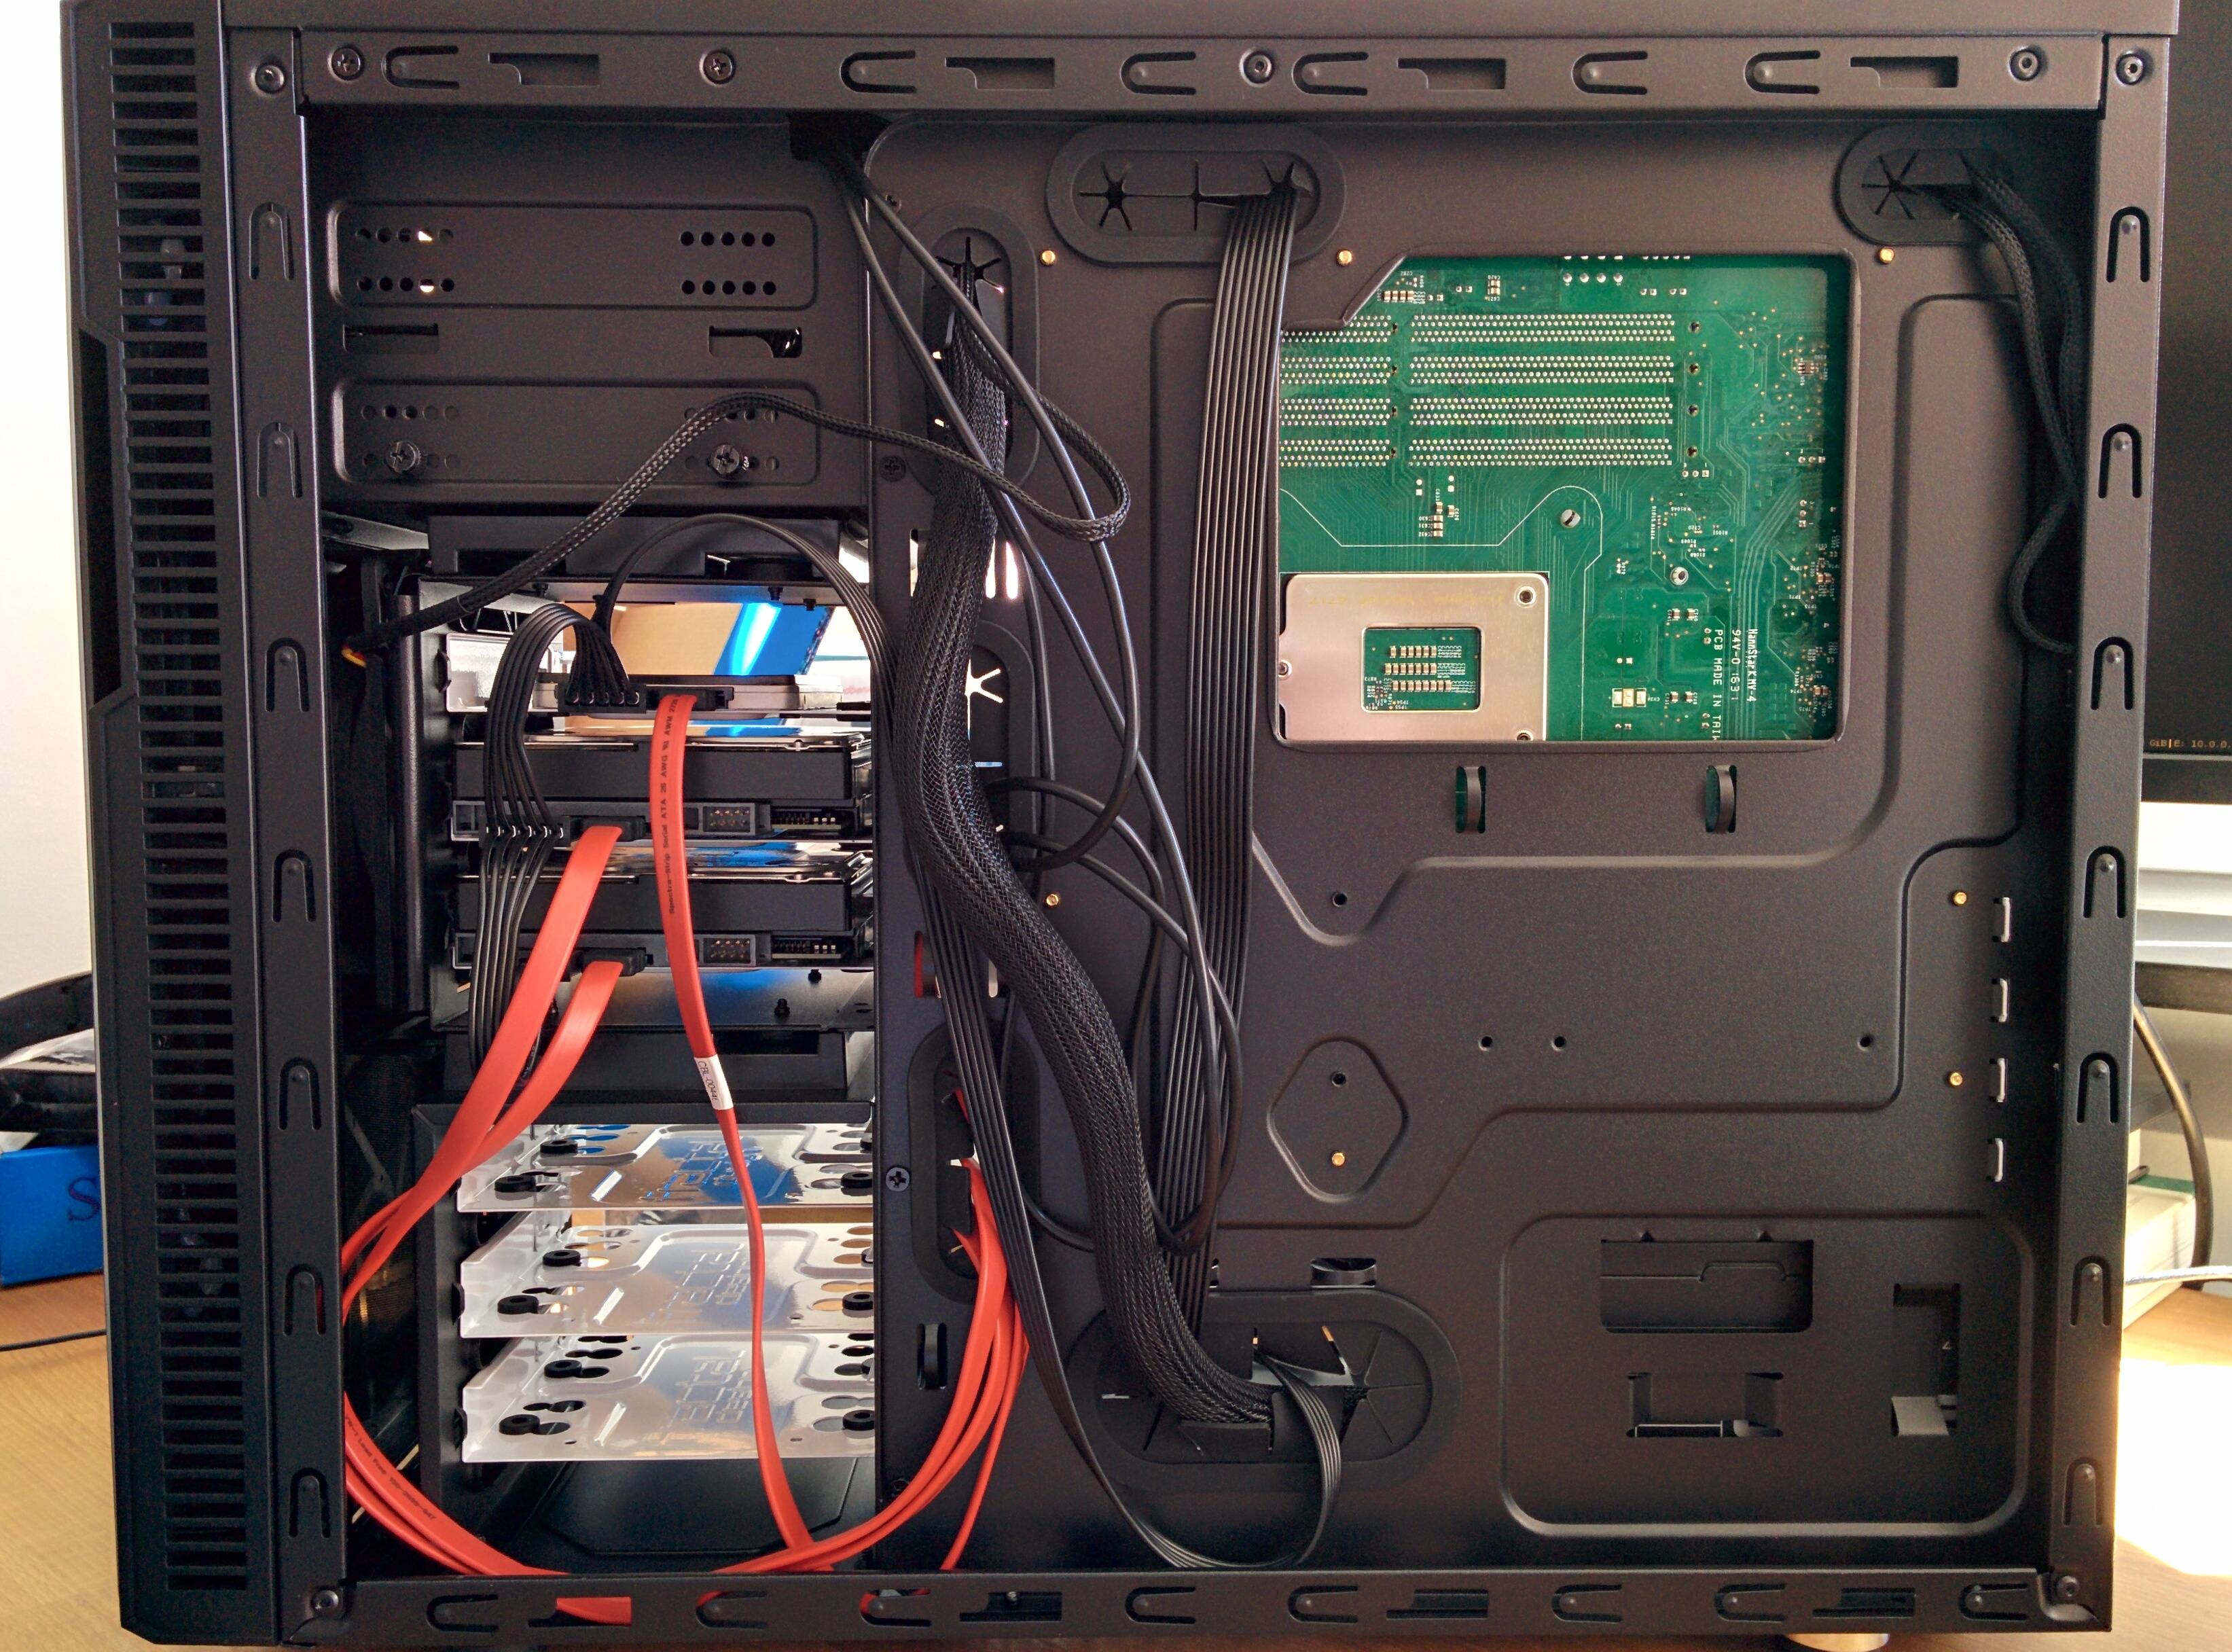
All the cables tucked away neatly in the back, to allow for the best possible airflow in the case. There is just enough space to fit the fattest cable (ATX power) back there.
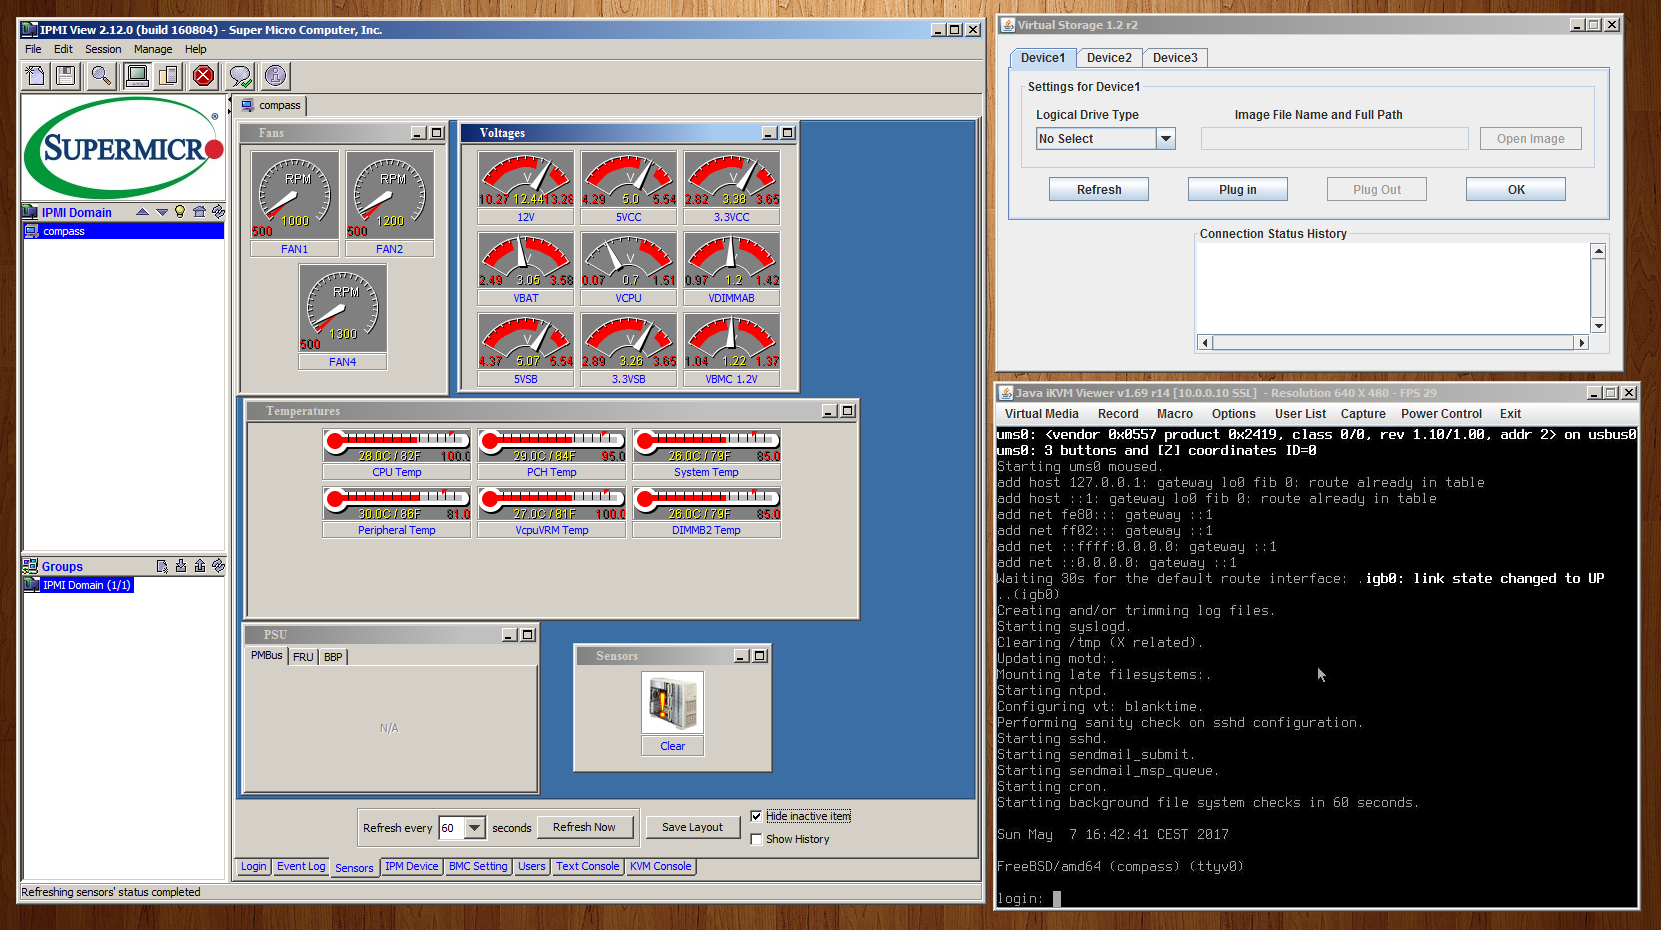
IPMI
Since this is a server motherboard, it has remote management in the form of IPMI. This means that there will never be a keyboard, mouse, or monitor connected to this computer, only network and power. This is normally only relevant for datacenters, when the computer is physically farther away from you, but it does not hurt to have at home either. =)
It includes features such as:
- Reboot, power on and off.
- Monitor sensors.
- Text Console.
- KVM Console.
- Mount ISOs remotely for OS installations.
The IPMI chip is powered on and “booted” automatically as soon as power is plugged in to the motherboard. It is always on even when the actual system is powered off, this is what allows turning on the computer remotely. And it is tightly integrated with the onboard graphics chip, which enables the KVM console.
Here is a look at the IPMIView software provided by SuperMicro. As far as I know it is only available as a Java based GUI program for Windows.
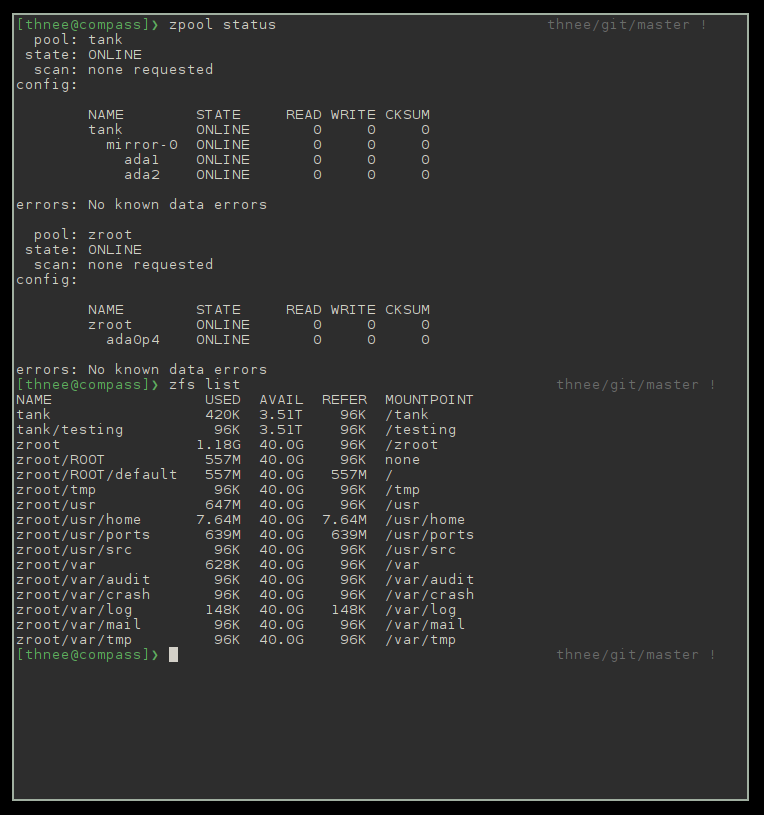
ZFS
The filesystem of choice for this build is ZFS. It is truly remarkable and I am very grateful that there is such a stable and feature rich filesystem available as open source. It provides enterprise grade data integrity and fault tolerance, and it does so with an incredibly simple an intuitive interface nonetheless. Considering Star Wars is stored on ZFS, it should be good enough for me!
A word of warning though, if you are considering using ZFS, you need to really do your homework beforehand, and be very sure that you are picking the right configuration for you from the start. It is perfectly possible to create a configuration that is unsafe and impossible to fix without destroying the pool and starting over from scratch, because vdevs cannot be removed from a pool once they have been added. Even though the interface is easy to use, ZFS does not prevent you from building a foot gun.
Below is a screenshot of what it can look like when inspecting a zfs pool.
In this case I have two pools:
zrootwhich was created automatically during installation of FreeBSD by choosing the “root on ZFS” option.tankwhich was created by me, it contains a vdev consisting of the two WD Red drives in a mirror configuration.
Upgrading
Upgrades will mainly consist of adding more WD Red drives to the tank pool,
as additional mirror vdevs,
as well as adding more RAM.
With ZFS, adding additional drives into an existing pool is dead simple,
it should be literally a single command.
When adding more storage to a ZFS pool,
it automatically expands the size of the pool,
and all of that space becomes available to all the file systems in that pool.